Essential Ceramic Kilns for Your Home Studio
A kiln is more than just a tool—it's the heart of a home studio, transforming raw clay into durable, finished ceramics. Whether you’re a beginner looking for a compact setup or an experienced potter ready to take your craft to the next level, choosing the right kiln is crucial. With so many options available, it’s important to understand the key factors that determine which kiln best suits your needs. This guide will walk you through everything you need to know to make an informed decision.
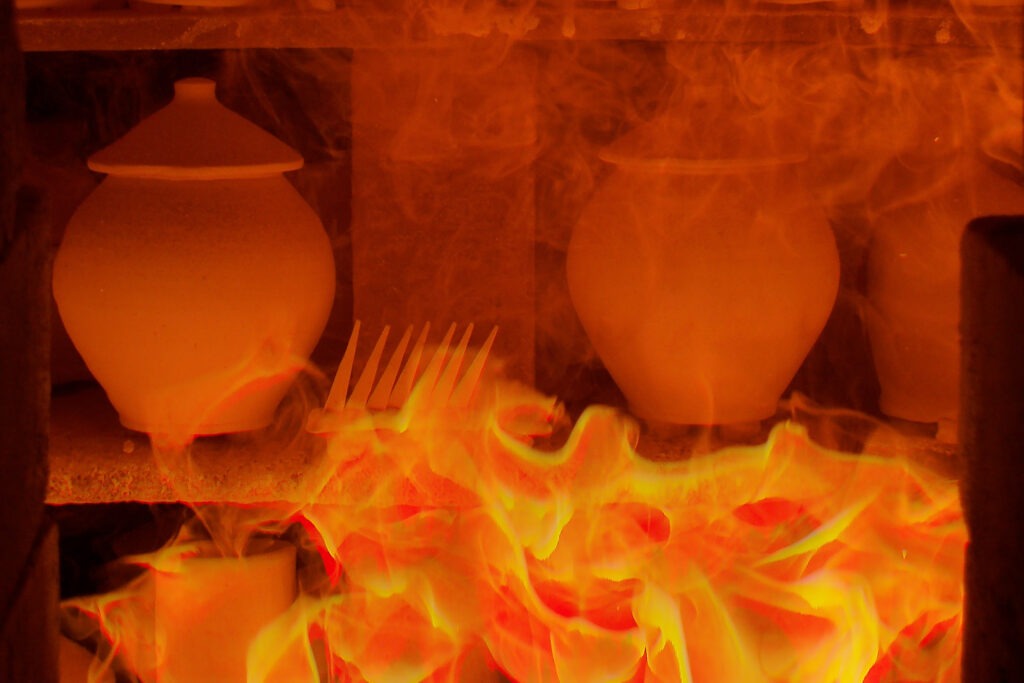
The Firing Process: Step by Step
Firing is the most crucial stage in ceramics, transforming soft clay into durable, finished pottery. Understanding each step ensures better results, whether you’re bisque firing for the first time or mastering complex glaze firings.
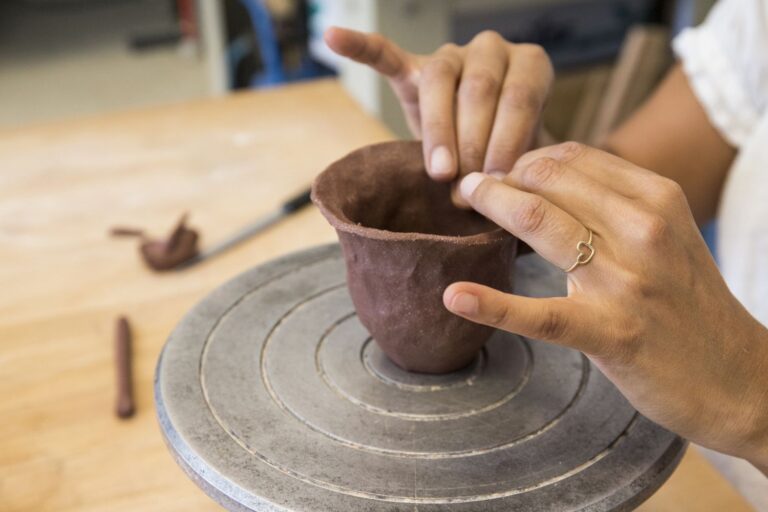
1. Preparing Your Pieces for Firing
Before loading your kiln, ensure that your pottery is completely dry. Any residual moisture can cause pieces to crack or even explode due to steam buildup. A good rule of thumb is to let pieces air dry for at least a week, depending on thickness and humidity.
Tip: If unsure whether your piece is dry, hold it against your cheek—if it feels cool, there’s still moisture inside.
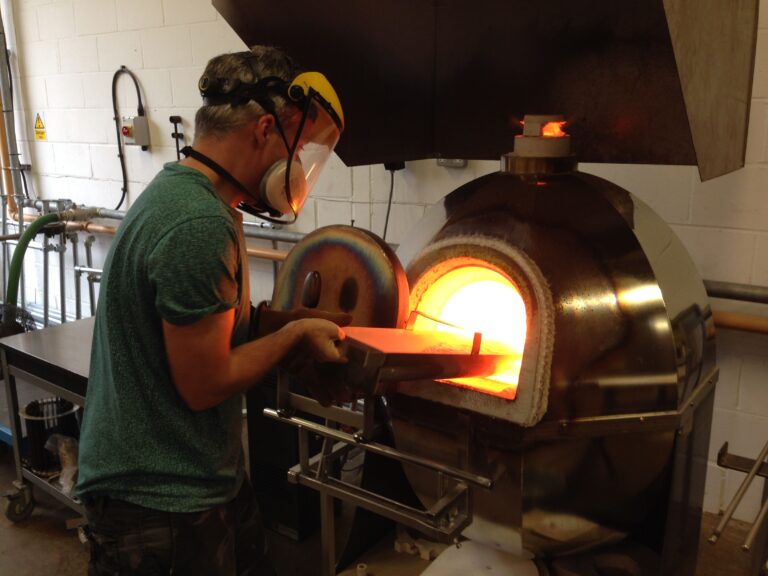
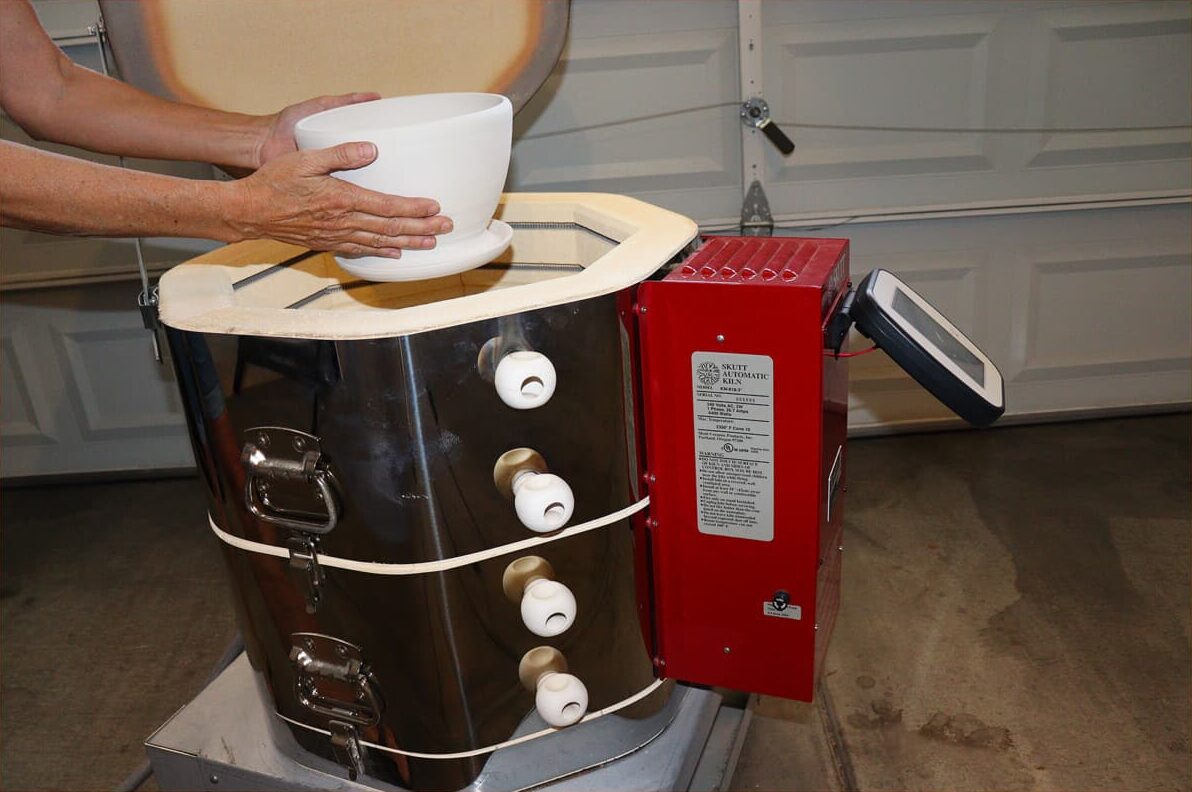
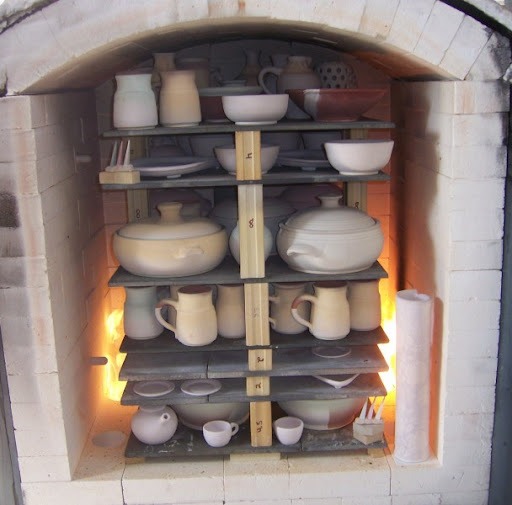
2. Loading the Kiln Properly
Careful kiln loading prevents breakage and ensures even heating. Here’s what to keep in mind:
- For bisque firing, pieces can be stacked since the clay remains porous and allows gases to escape.
- For glaze firing, avoid stacking—glazed surfaces should not touch, as molten glaze will fuse pieces together.
- Maintain at least 1 inch (2.5 cm) of space between walls and shelves for proper air circulation.
- Use stilts or kiln furniture to support delicate or irregularly shaped pieces.
Example: When firing plates, stand them upright on plate setters to reduce warping.
3. Choosing the Right Firing Schedule
Each type of clay and glaze requires a specific temperature and heating curve. Most kilns allow you to program ramp rates, soaking periods, and cooling times.
- Bisque firing (cone 06−04, ~1,820°F/995°C): A slow ramp-up helps burn off organic materials, making the clay more durable for glazing.
- Glaze firing (cone 5−6 for mid-range, cone 9−10 for high fire): A carefully controlled heating process ensures smooth glaze melting without defects like pinholes or crawling.
Tip: Firing too fast can lead to thermal shock, causing cracks or explosions. Always follow recommended ramp rates.
4. Venting and Managing Kiln Atmosphere
During the early firing stages, organic materials in the clay burn off, releasing gases. Proper ventilation prevents carbon trapping, which can affect glaze color.
- For electric kilns, leave the kiln vent open for the first few hours to allow fumes to escape.
- For gas kilns, adjusting oxygen levels controls reduction or oxidation atmospheres, impacting glaze outcomes.
5. The Soaking Phase
Many firings include a hold period (soak time) at peak temperature to ensure even heat distribution. This step is crucial for glaze maturation and helps eliminate defects.
- A 5−10 minute soak can smooth out glaze surfaces and improve bonding.
- Longer soaks (up to 30 minutes) are useful for high-fire ceramics, ensuring the entire kiln load reaches an even temperature.
Example: A potter firing translucent porcelain might use a long soak to achieve a perfectly smooth, glass-like finish.
6. Cooling Down Slowly
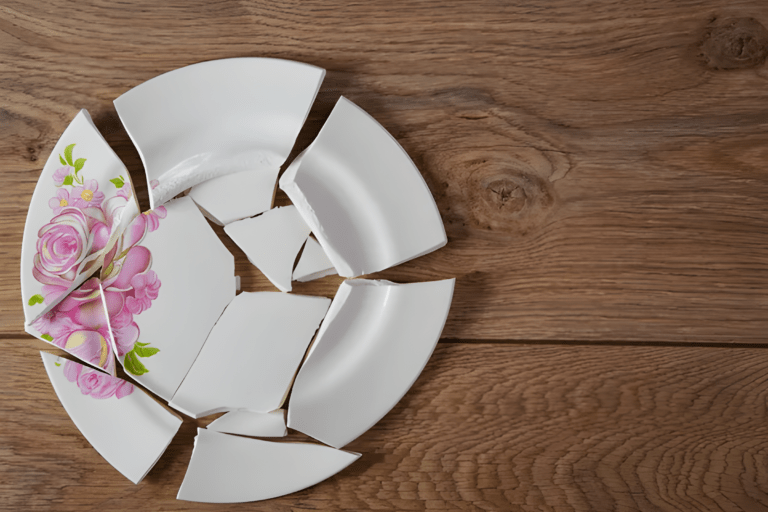
Cooling is just as important as heating. If the kiln cools too quickly, pieces can crack due to thermal shock.
- Most kilns automatically control cooling, but manually slowing down the process—especially in the 1,000°F-1,400°F (538°C-760°C) range—prevents dunting (cracking due to stress).
- Some potters hold the kiln around 1,300°F (700°C) for 30 minutes before shutting off to allow glazes to properly set.
Tip: Avoid opening the kiln until it drops below 200°F (93°C)—otherwise, rapid temperature changes can cause cracks or crazing.
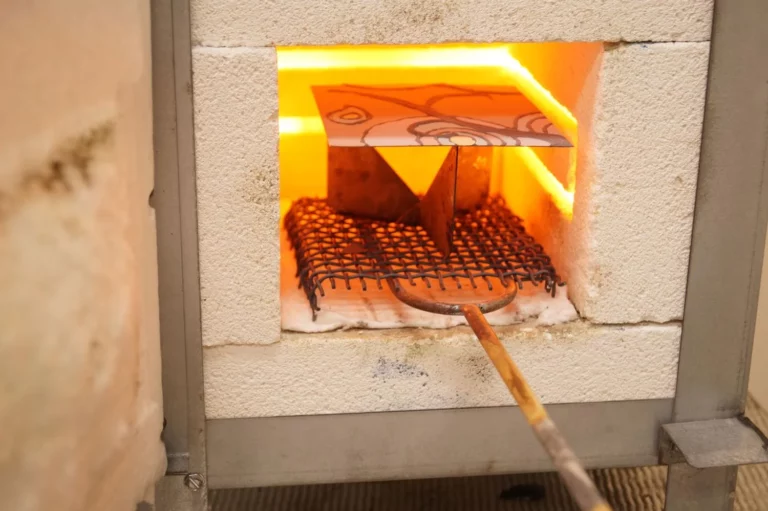
7. Unloading and Inspecting the Results
Once the kiln has fully cooled, carefully unload your pieces. Check for common issues like:
- Underfired clay (still porous or chalky) → Increase peak temperature next time.
- Overfired glaze (dripping or pooling) → Reduce soak time or firing temp.
- Pinholes or bubbles → May indicate trapped gases; try slower bisque firing.
Final Step: If satisfied, your pieces are complete! If adjustments are needed, some potters do a refire to correct minor glaze flaws.
Would you like to expand on troubleshooting common firing issues?
Kiln Heating Systems
Kilns come with different heating systems, each offering unique advantages depending on the type of firing, energy efficiency, and level of control needed. Choosing the right heating system is essential for achieving consistent results in ceramics, glasswork, or metalwork. Let’s break down the main types of kiln heating systems and how they work.
1. Electric Kilns: Reliable and Easy to Use
How They Work:
Electric kilns use coiled metal elements (usually made of Kanthal or Nichrome wire) embedded in the kiln walls. When electricity flows through these coils, they generate heat, gradually increasing the internal temperature.
Best For:
✔ Hobbyists and home studios
✔ Consistent and controlled firings
✔ Low to mid-range temperature firings (cone 06−10)
Pros:
✅ Simple to operate with programmable controllers
✅ Clean and efficient—no need for fuel or ventilation
✅ Great for oxidation firings (bright, true glaze colors)
Cons:
❌ Cannot achieve reduction atmospheres (needed for some high-fire glazes)
❌ Heating elements degrade over time and need replacement
Example: Most small pottery studios and classrooms use electric kilns due to their convenience and precise temperature control.
2. Gas Kilns: Ideal for Reduction Firing
How They Work:
Gas kilns use natural gas or propane as a fuel source. Burners at the bottom or sides of the kiln create an open flame, heating the chamber. The atmosphere inside can be controlled to allow for oxidation (with oxygen) or reduction (limited oxygen), affecting glaze and clay body appearance.
Best For:
✔ High-fire pottery (cone 8−12)
✔ Reduction firing (for deep, rich glaze effects)
✔ Large-scale production studios
Pros:
✅ Can reach very high temperatures
✅ Allows for reduction firing, creating unique glaze effects
✅ Fuel cost may be lower than electricity in some areas
Cons:
❌ Requires proper ventilation and safety precautions
❌ Less precise control than electric kilns
❌ More maintenance and expertise needed to operate
Example: Traditional Japanese pottery techniques, such as Shino or Celadon glazes, rely on gas-fired kilns to create their characteristic deep colors.
3. Wood-Fired Kilns: Traditional and Artistic
How They Work:
Wood kilns are fueled by burning wood, requiring constant stoking and management. The ash from burning wood interacts with the pottery’s surface, creating natural glaze effects that are highly prized in artistic ceramics.

Best For:
✔ Unique, unpredictable glaze finishes
✔ Traditional or experimental ceramic artists
✔ Large outdoor kilns with ample space
Pros:
✅ Creates stunning, one-of-a-kind surface effects
✅ Natural wood ash glazing adds depth and texture
✅ Can reach very high temperatures (cone 10+)
Cons:
❌ Labor-intensive—requires constant monitoring and wood supply
❌ Long firing times (often 24−72 hours)
❌ Harder to control temperature and consistency
Example: Wood kilns are often used in Anagama and Noborigama kilns, which produce unique flame patterns and ash glazing effects.
4. Raku Kilns: Fast and Dramatic
How They Work:
Raku kilns are usually gas-powered, with pieces pulled out at around 1,800°F (982°C) while still glowing hot. The pottery is then placed in a reduction chamber (such as a metal container filled with sawdust or newspaper), where the rapid cooling and smoke create unpredictable patterns and crackle glazes.
Best For:
✔ Quick, dramatic firings
✔ Experimental or decorative pottery
✔ Outdoor firing setups
Pros:
✅ Fast firing cycles (often under an hour)
✅ Exciting, spontaneous glaze effects
✅ Can be used with small, portable kilns
Cons:
❌ Not suitable for functional pottery (porous clay bodies)
❌ Risk of thermal shock—pieces may crack if cooled too quickly
Example: Many contemporary ceramic artists use raku firing to create unpredictable glaze effects and bold surface textures.
5. Microwave Kilns: Compact and Innovative
How They Work:
Microwave kilns are small, portable kilns that fit inside a standard microwave. They contain a special insulating material that concentrates and amplifies microwave energy, heating the inside to over 1,650°F (900°C) within minutes.
Best For:
✔ Small jewelry pieces and glass fusing
✔ Quick tests and experiments
✔ Studios with limited space
Pros:
✅ Extremely fast firing times (often under 10 minutes)
✅ Low cost and energy-efficient
✅ Portable and easy to store
Cons:
❌ Limited to very small projects
❌ Cannot reach high temperatures needed for stoneware or porcelain
❌ Uneven heating can be a challenge
Example: A jeweler might use a microwave kiln to quickly fire glass pendants or test glaze samples before a full kiln firing.
Which Kiln Heating System is Right for You?
- Beginners & Home Studios → Electric kilns (easy to use, clean, and controlled)
- Professional or High-Fire Potters → Gas or wood kilns (higher temperatures and atmospheric control)
- Artists Seeking Unique Surfaces → Raku or wood kilns (unexpected, artistic finishes)
- Jewelry & Small Projects → Microwave kilns (quick and compact)
Each kiln type has its strengths and limitations, so consider your space, firing needs, and budget before choosing the right one. Need help narrowing it down? Let me know what you’re looking for!
Understanding Temperature Control and Firing Curves
Temperature control is just as important as the heating elements themselves. Modern kilns use digital controllers to precisely regulate firing schedules, including ramp rates (how fast the kiln heats up), soaking times (how long a temperature is maintained), and cooling rates.
A good example of precise temperature control is when firing porcelain vs. earthenware. Porcelain requires a slow, controlled ramp-up to avoid cracking, while earthenware can tolerate faster heating. By programming a kiln with specific cone settings, artists can achieve the desired maturity for different clay and glaze types.
Example: A potter working with stoneware at cone 6 (~2,232°F / 1,222°C) needs a steady increase in temperature with a controlled cooling phase to prevent thermal shock. A proper controller will gradually reduce the heat instead of shutting off suddenly, avoiding warping or cracking.
Some kilns feature PID controllers (Proportional-Integral-Derivative), which adjust power output in real time based on temperature fluctuations. This advanced system prevents overheating and ensures consistency between firings, making it a valuable feature for serious ceramicists.
Manual vs. Digital Controls
Older kilns often use manual dials that require constant monitoring and adjustments throughout the firing process. While this allows for a hands-on approach, it can lead to inconsistencies if not carefully managed.
In contrast, digital controllers automate firing, removing guesswork and providing repeatable results. Some even allow for WiFi connectivity, enabling potters to monitor firings remotely and receive alerts when cycles are complete. This is particularly useful for long firing schedules that extend overnight or require gradual cooling.
Example: A ceramic artist using a kiln with a touchscreen controller can program multiple firing profiles for different projects—one for bisque firing, another for glaze firing—ensuring each batch receives the exact conditions needed for the best results.
Why Proper Heating and Temperature Control Matter
A kiln with even heat distribution and precise temperature regulation allows for more predictable results, reducing the risk of underfired or overfired pieces. Whether working with low-fire earthenware (cone 06−04), mid-range stoneware (cone 5−6), or high-fire porcelain (cone 9−10), understanding your kiln’s heating system and controls will help you fine-tune your firing process for the best possible outcomes.
Would you like to expand on any specific aspect, such as troubleshooting temperature fluctuations or optimizing firing schedules?
Choosing the Right Kiln for Your Home Studio
Selecting a kiln for your home studio is a balance between practicality, artistic goals, and technical constraints. The right kiln should fit your space, handle the materials you work with, and align with your firing needs. Let’s break down the key considerations to help you make an informed decision.
Kiln Size and Studio Space
The size of your kiln is dictated by both the scale of your work and the space you have available. Smaller tabletop kilns are perfect for jewelry, small sculptures, or test firings, while larger floor models accommodate bigger ceramic pieces and bulk production.
Even if space is limited, ensure at least two feet of clearance around the kiln for ventilation and safety. Proper airflow prevents overheating and improves firing efficiency.
Consider ceiling height as well—top-loading kilns require enough room to lift the lid comfortably, while front-loading models need sufficient clearance for the door to swing open.
Power Supply and Electrical Requirements
Home kilns run on either standard household voltage (120V) or require a dedicated 240V circuit. Before purchasing a kiln, check your home’s electrical capacity:
- 120V kilns: Plug into standard outlets but have lower firing temperatures and smaller chamber sizes.
- 240V kilns: Provide higher firing power but may require professional electrical installation.
Amperage is equally important. Large kilns often demand 30 to 60 amps, which may exceed what a typical household circuit can handle.
Firing Temperatures and Compatibility with Clay & Glazes
Different clays and glazes require specific temperature ranges:
- Low-fire (Earthenware & Raku): Fires at 1,820°F — 2,100°F (Cone 06−04), preserving bright glaze colors.
- Mid-fire (Stoneware): Requires 2,102°F — 2,192°F (Cone 5−6) for durable, semi-vitreous results.
- High-fire (Porcelain & High-Fire Stoneware): Reaches 2,300°F — 2,400°F (Cone 9−10), producing fully vitrified ceramics.
If you plan to experiment with various materials, choose a kiln with a temperature range that exceeds your highest firing needs.
Ventilation & Safety Considerations
Kilns release heat and fumes, especially when firing glazes that contain volatile compounds. While some models have built-in ventilation systems, others require external venting solutions, such as downdraft vents or room exhaust systems.
Even electric kilns release carbon monoxide and other gases. Always fire in a well-ventilated space, ideally with a kiln vent or open windows to ensure proper air circulation.
Additionally, placement near flammable materials should be avoided. Kilns should be positioned on heat-resistant surfaces, away from walls, furniture, and storage.
Ease of Use & Controller Options
Modern kilns come with different control systems, from manual dials to digital touchscreens.
- Manual kilns require hands-on temperature adjustments throughout firing.
- Basic digital controllers allow you to set firing schedules and automate temperature changes.
- Advanced programmable controllers provide precise multi-stage firing, memory storage, and even Wi-Fi connectivity for remote monitoring.
If you’re a beginner, a digital controller can simplify the process, ensuring more consistent results.
Budget & Long-Term Investment
While small kilns are more affordable, they may limit your creative possibilities. Investing in a slightly larger or higher-temperature model can provide greater flexibility as your skills progress. Additionally, consider long-term costs, including electricity consumption, kiln furniture (shelves & stilts), and potential electrical upgrades.
Choosing the right kiln is about finding the perfect balance between space, power, material compatibility, and ease of use. By evaluating these factors, you can set up a home studio that meets both your current and future artistic needs.
Features That Matter When Choosing a Kiln
When selecting a kiln for your home studio, it’s easy to focus solely on size and temperature range. However, several key features can significantly impact your workflow, efficiency, and even the longevity of your kiln. Let’s explore the most important ones.
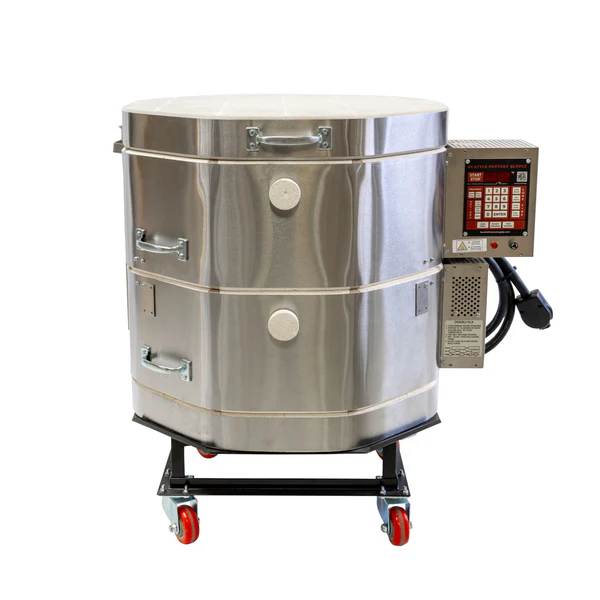
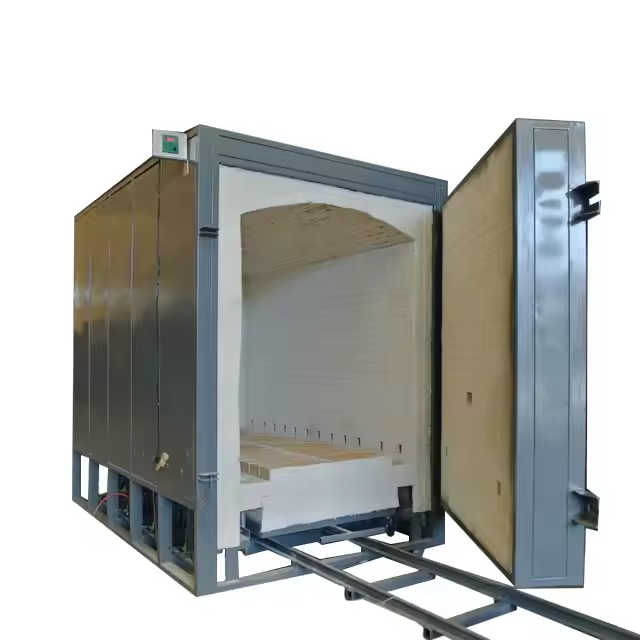
Loading Style: Top-Loading vs. Front-Loading
The way you load your kiln affects both convenience and ergonomics.
- Top-loading kilns: Most common for home studios, these have a lid that lifts upward, allowing you to arrange pieces inside. They are generally more affordable but can be challenging to use if you have back or mobility issues.
- Front-loading kilns: Feature a door that swings open like an oven, making it easier to load and unload larger or heavier pieces. These are often preferred in professional studios but tend to be more expensive.
Example: If you frequently create tall sculptures or large plates, a front-loading kiln can make stacking and organizing your pieces much easier compared to a deep top-loading model.
Kiln Insulation & Heat Retention
Kilns use either soft firebrick or ceramic fiber insulation. Each material has its pros and cons:
- Soft firebrick (most common): Retains heat well and provides durability for long-term use. However, it takes longer to heat up and cool down.
- Ceramic fiber: Found in some specialty kilns, this insulation heats up and cools down faster, making it ideal for raku firings and quick test batches. However, it may wear out faster over time.
For general pottery use, a soft firebrick kiln is usually the better choice, as it provides stability for consistent firings.
Programmable Controllers & Automation
Modern kilns come with various controller options, ranging from basic manual dials to advanced touchscreen systems with Wi-Fi capabilities.
- Manual controllers: Require constant monitoring and manual adjustments throughout the firing process.
- Basic digital controllers: Allow you to set target temperatures and hold times, making the firing process more predictable.
- Advanced programmable controllers: Offer multi-step firing programs, data logging, and remote access through mobile apps.
Example: If you fire delicate porcelain or multi-layered glazes, a programmable controller with ramp-hold capabilities ensures precise temperature control for better results.
Ventilation Systems & Airflow
Proper ventilation is crucial for removing fumes and maintaining an even firing atmosphere inside the kiln. Some kilns come with built-in venting systems, while others require external venting solutions.
- Passive vents: Small holes in the kiln’s body allow gases to escape naturally but may not be sufficient for certain glazes.
- Downdraft vent systems: Actively pull fumes away, ensuring better air circulation and color consistency in glazed pieces.
- External ventilation (e.g., wall exhaust fans): Helps keep your studio air clean and reduces heat buildup.
For enclosed spaces, a downdraft vent system is highly recommended to improve air quality and protect both your work and your health.
Shelving & Interior Layout
The way a kiln’s interior is designed can influence how efficiently you use its space. Most kilns come with modular shelving that allows for flexible stacking of pottery pieces.
- Kiln shelves: Made from high-temperature materials like cordierite, these allow you to stack multiple layers of work.
- Posts & stilts: Help create adjustable heights between shelves to accommodate different-sized pieces.
- Heat distribution: Larger kilns with multiple heating elements provide more even temperature distribution, reducing hot or cold spots inside the chamber.
Example: If you fire a variety of small and large pieces, investing in extra kiln shelves and stilts will help you maximize the firing load and improve efficiency.
Durability & Long-Term Maintenance
A kiln is a long-term investment, and choosing one with durable components can save you money in the long run. Look for:
- Replaceable heating elements: Over time, elements wear out and need to be replaced—models with easily accessible coils simplify maintenance.
- Heavy-duty latches & hinges: Prevent warping and ensure the kiln door or lid remains securely sealed.
- Quality thermocouples: These sensors measure temperature inside the kiln. Upgrading to a higher-quality thermocouple can improve firing accuracy.
Additionally, consider the manufacturer’s reputation and availability of replacement parts, as some brands offer better long-term support than others.
Common Mistakes to Avoid When Buying a Kiln
Choosing the right kiln is a significant decision for any ceramic artist or hobbyist. A kiln is a long-term investment, and making the wrong choice can lead to frustration, unexpected costs, and even damage to your work. Here are some of the most common mistakes people make when buying a kiln—and how to avoid them.
1. Ignoring Power Requirements
Many beginners overlook whether their home studio can actually support the kiln they want.
- Standard household outlets (120V) can power smaller kilns but may not be suitable for firing at high temperatures or for larger loads.
- Larger kilns often require 240V or even 3-phase power, which might mean upgrading your electrical panel—an expensive surprise if not planned in advance.
- Amperage matters, too: Even if your space has the correct voltage, you need to ensure your circuit can handle the kiln’s power draw without tripping breakers.
Example: A potter purchases a medium-sized kiln for cone 10 firings, only to realize their garage has only 120V outlets. The cost of upgrading their electrical system ends up being higher than the kiln itself.
2. Choosing the Wrong Size
Bigger isn’t always better, and smaller isn’t always more economical.
- Too small: A kiln that’s too small for your needs means frequent firings, leading to higher energy costs and more wear and tear.
- Too large: A kiln that’s too big wastes energy if you’re not consistently filling it. It also takes up valuable studio space.
Think about both your current work and how your production might grow in the future.
Example: A beginner buys a tiny test kiln, only to outgrow it within a few months. They then have to spend even more money on a second, larger kiln.
3. Overlooking Ventilation Needs
Kilns release heat, fumes, and potentially toxic gases, especially when firing certain glazes or clay bodies. Poor ventilation can cause:
- Health risks from inhaling fumes.
- Glaze imperfections due to inconsistent air circulation.
- Studio overheating, making it uncomfortable to work.
Always plan for proper ventilation—whether that’s a built-in downdraft vent system, an external exhaust, or simply placing the kiln in a well-ventilated area.
Example: Someone sets up their kiln in a basement without proper venting, only to experience eye irritation and inconsistent glaze finishes.
4. Focusing Only on Price Instead of Long-Term Value
It’s tempting to go for the cheapest kiln available, but this can be a mistake if it lacks essential features or is from an unreliable brand.
- Cheaper kilns may have lower-quality insulation, leading to higher energy consumption over time.
- Limited controller options can make firing more difficult, requiring more manual adjustments.
- Hard-to-find replacement parts may mean costly repairs or even replacing the entire kiln sooner than expected.
Example: A ceramicist buys a budget kiln with manual controls, thinking they’re saving money. A year later, they regret it when they realize a programmable controller would have made their workflow much easier.
5. Not Researching the Manufacturer and Support Options
A kiln is a long-term investment, and good customer support can make all the difference.
- Does the manufacturer offer technical support? Some companies have great customer service, while others make it difficult to get help.
- Are replacement parts easy to find? Certain brands have proprietary parts that can be expensive or difficult to replace.
- Are there local technicians available? If your kiln needs repairs, will you be able to find someone who can fix it?
Example: A potter buys an imported kiln with no local distributor. When a heating element fails, they have to wait months for a replacement part to arrive from overseas.
Safety Tips: Protecting Yourself and Your Workspace
1. Choose the Right Location
- Keep your kiln in a well-ventilated area to prevent heat buildup and exposure to fumes.
- Maintain at least 12−18 inches of clearance around the kiln to prevent fire hazards.
- Avoid placing the kiln near flammable materials like wood, paper, or curtains.
2. Install Proper Ventilation
- Even if your kiln fires at low temperatures, it releases fumes and gases that should be vented outside.
- Options include:
- Built-in downdraft vents that pull fumes through the bottom of the kiln.
- External venting systems that direct exhaust outside through ducts.
- Natural ventilation (keeping windows and doors open), though it’s less effective.
3. Electrical Safety
- Always plug your kiln into a dedicated circuit to prevent electrical overload.
- If your kiln runs on 240V, ensure a licensed electrician installs the wiring.
- Never use an extension cord—they aren’t designed to handle a kiln’s power load.
4. Use Proper Protective Gear
- Heat-resistant gloves protect your hands when loading or unloading a hot kiln.
- Safety glasses or goggles shield your eyes from dust and debris.
- A respirator mask is useful when handling glaze chemicals or kiln wash.
5. Be Cautious During Firing
- Never open the kiln when it’s at high temperatures—a sudden rush of cool air can cause thermal shock.
- If your kiln has a peep hole, use it to check progress instead of lifting the lid.
- Allow the kiln to cool completely before unloading—rushing this process can crack your work.
Kiln Maintenance: Keeping It in Top Shape
Regular maintenance prevents damage and ensures consistent firing results.
1. Keep the Kiln Interior Clean
- Vacuum kiln dust periodically to prevent buildup, which can affect firings.
- Avoid scraping the bricks, as they are fragile—use a soft brush instead.
2. Check the Elements Regularly
- Kiln elements wear out over time and can lead to uneven heating.
- If you notice slow firing times or inconsistent results, inspect the elements for damage.
3. Inspect the Kiln Shelves and Posts
- Apply kiln wash to prevent glaze from sticking to shelves.
- Replace shelves with deep cracks, as they can break during firing.
4. Monitor the Thermocouple
- The thermocouple measures temperature inside the kiln.
- If firings seem inaccurate, a worn thermocouple might be the issue and should be replaced.
5. Check the Kiln Lid and Hinges
Tighten any loose hinge bolts to prevent unnecessary strain on the lid.
Make sure the lid opens and closes smoothly—misaligned lids can cause heat loss.
Conclusion
Choosing the right kiln for your home studio is an exciting step in your ceramics journey. Whether you’re a beginner experimenting with small projects or an experienced artist producing larger works, the right kiln will enhance your creative process and help you achieve consistent, high-quality results.
By understanding how kilns work, key features to look for, and common mistakes to avoid, you can make an informed decision that suits your space, budget, and artistic goals. Prioritizing safety and maintenance ensures that your kiln remains reliable and efficient for years to come.
Investing in a kiln isn’t just about equipment—it's about unlocking new possibilities in your craft. With the right setup and care, your home studio can become a space where your artistic vision truly comes to life. Happy firing! 🔥