Marbled Clay Magic: Transform Your Ceramics
Marbled pottery is one of the most captivating techniques in ceramics, blending different colors of clay or decorative surface treatments to create swirling, organic patterns. This method has been used for centuries in various cultures, from ancient Chinese agateware to the classic Japanese nerikomi technique. Today, marbled pottery continues to inspire artists and hobbyists alike, offering endless opportunities for creative expression.
Marbling can be done in different ways: by mixing colored clays together before shaping the pottery, by layering liquid slips or underglazes on the surface, or even by using glazing techniques to create a marbled effect during firing. Whether you throw your pots on the wheel or prefer hand-building, there is a marbling method suited to your style.
This guide will take you through five comprehensive techniques for achieving stunning marbled pottery, with detailed steps and insights into each method.
Marbling Clay on the Pottery Wheel
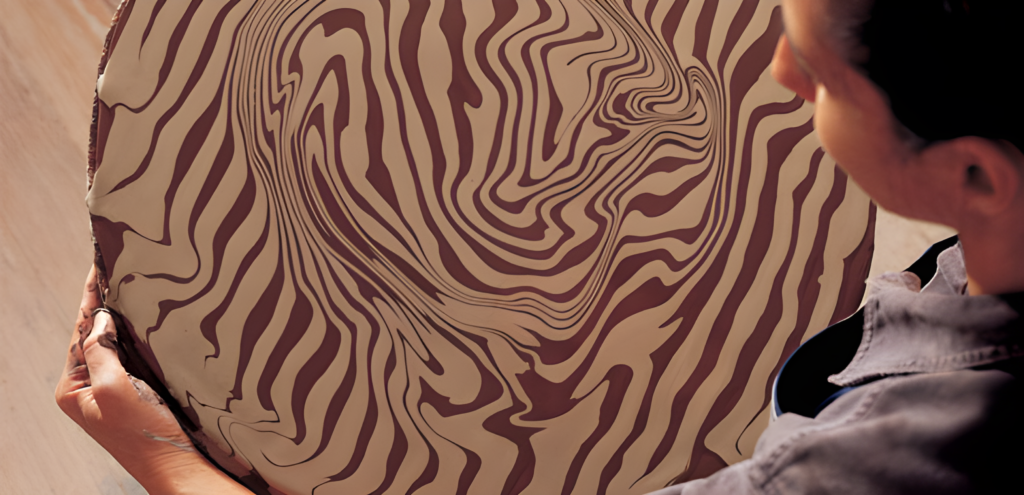
Throwing marbled clay on a wheel requires careful preparation to ensure the colors blend harmoniously without turning into a muddy mix. The key is to preserve the distinct layers of color while shaping the pot.
Choosing the Right Clay
To achieve the best results, you need at least two types of clay in different colors. Natural variations in clay, such as red earthenware and white porcelain, can create beautiful organic contrasts. However, mixing different clay bodies requires caution. They must:
- Have similar firing temperatures to avoid issues during kiln firing.
- Shrink at the same rate to prevent cracking.
- Contain similar moisture levels to ensure even workability.
If you want more control over the color palette, you can create custom-colored clay by mixing ceramic stains or oxides into white or buff-colored clay.
Preparing the Clay for Marbling
Once you have your colored clays, prepare them by rolling them into uniform slabs or cylinders. A simple yet effective way to create a marbled pattern is to:
- Slice the clay into sections.
- Stack the slices, alternating colors.
- Gently press them together and roll them into a ball.
- Lightly wedge the clay—just enough to bond the layers without over-mixing the colors.
<blockquote>Too much wedging will cause the colors to blend too much, reducing the clarity of the marbling effect.</blockquote>
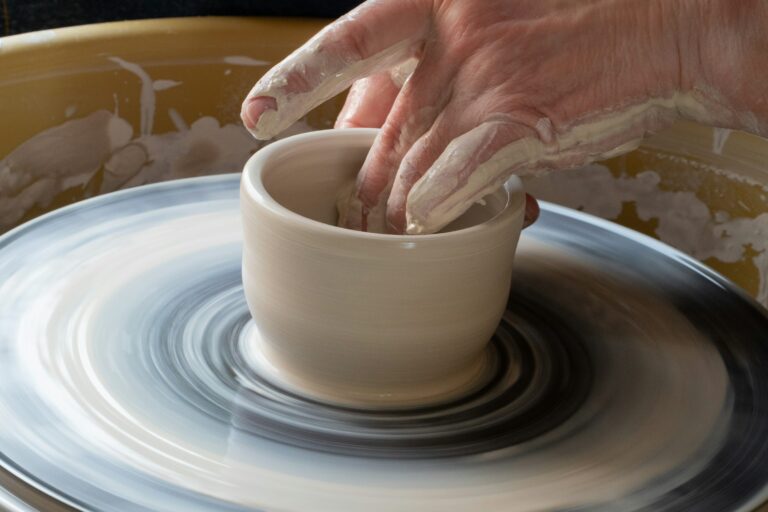
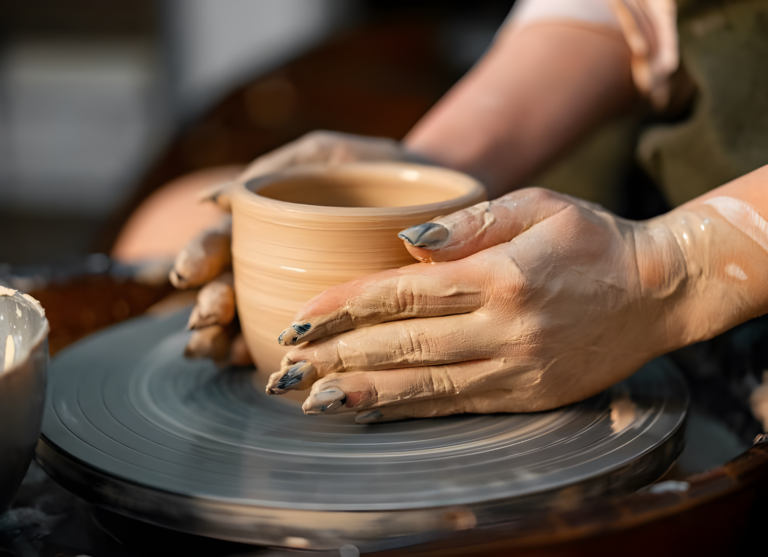
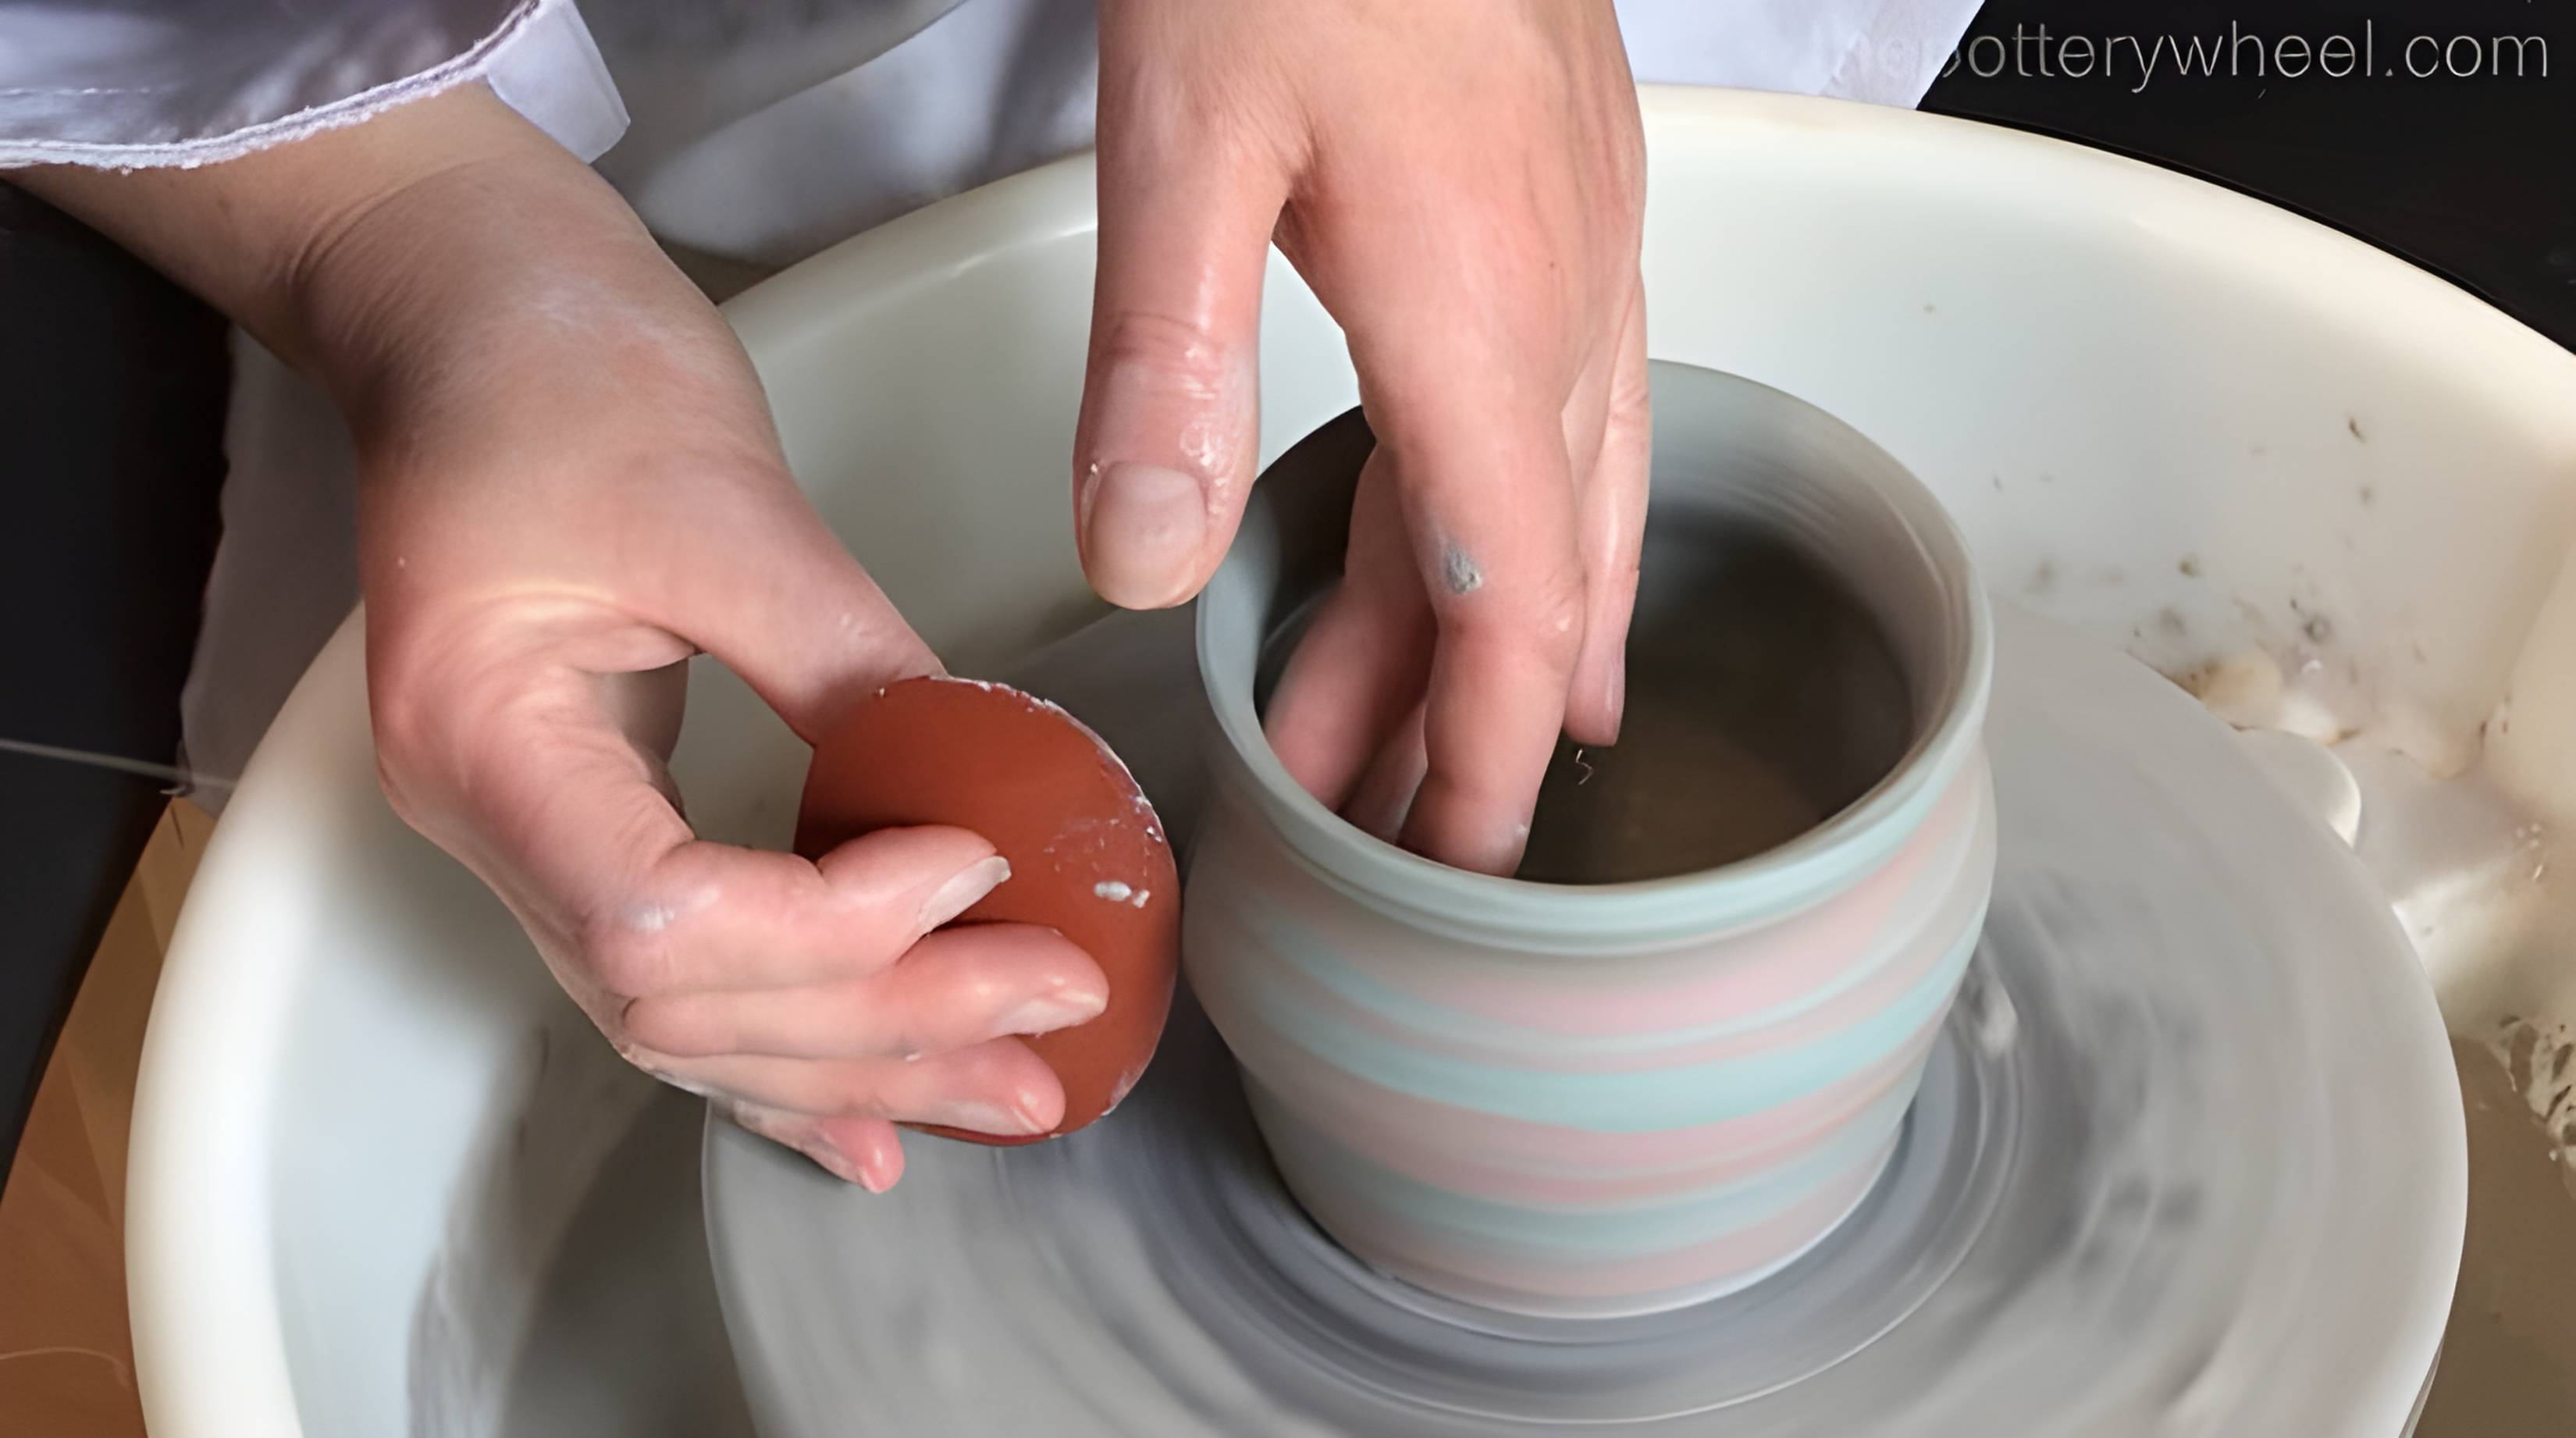
Throwing the Marbled Pot
When placing your marbled clay on the wheel, center it quickly. Excessive centering will mix the colors too much. Instead, use a steady, controlled touch to keep the layers intact.
As you throw, the marbled pattern will naturally distort, creating unique swirls that follow the curves of the pot. Once you finish shaping, you can enhance the effect by scraping away excess slip with a metal rib, revealing the layered design underneath.
Hand-Building Marbled Pottery
Preparing the Clay and Creating the Marbled Effect
The process begins with selecting multiple shades of clay that complement each other. Each type of clay is carefully kneaded to achieve uniform plasticity, ensuring a smooth consistency that prevents cracks or irregularities during shaping. The clay is then rolled into thin slabs or formed into separate coils, which are gently twisted and layered together. This step requires precision—overmixing can blur the patterns, while insufficient blending may result in uneven distribution of colors.

Shaping and Refining the Form
Once the marbled clay is prepared, it is shaped using hand-building techniques such as slab construction, coiling, or pinching. These methods allow for organic and fluid forms that showcase the swirling marbled patterns. Throughout the shaping process, the clay is smoothed and adjusted to enhance the natural flow of the design. Careful attention is given to maintaining the integrity of the pattern while ensuring structural stability.
Drying and Surface Enhancement
As the shaped piece begins to dry, it undergoes refinement to enhance the visual depth of the marbling. The surface is carefully smoothed with a damp sponge or burnished to highlight the contrast between colors. If additional definition is desired, a fine carving tool can be used to emphasize the natural swirls. Proper drying is crucial to prevent warping or cracking, requiring controlled conditions to allow the clay to set evenly.
Firing and Finishing Touches
Once fully dried, the piece is bisque-fired to solidify the form and prepare it for glazing. The choice of glaze can either intensify the marbled effect or provide a subtle, muted finish. Transparent or satin glazes work particularly well, enhancing the depth and vibrancy of the underlying patterns. A final high-temperature firing locks in the design, resulting in a unique, handcrafted ceramic piece with a striking marbled appearance.
Marbling Pottery with Underglaze
Marbling with underglaze begins with selecting the right colors and preparing the pottery surface. The piece should be in a bone-dry or leather-hard state to ensure optimal absorption. Different underglaze colors interact uniquely—some blend softly, while others maintain sharp contrast. Consistency is also important, as overly thick underglazes can create uneven patterns, while overly thin ones may run unpredictably.
Techniques for Creating Marbled Patterns
There are several approaches to achieving a marbled effect. One method involves using a brush to swirl colors directly onto the surface, allowing for organic, flowing designs. Another technique utilizes poured underglaze, where different shades are layered and manipulated by tilting the piece to encourage natural movement. Some artists prefer to use slip trailing, applying underglaze in fine lines and then agitating the surface to create intricate veining. Additionally, sgraffito can be combined with marbling by scratching away sections of underglaze to expose the clay body beneath, adding more depth to the design.
Firing and Glazing the Piece
Once the marbled underglaze design is complete, the pottery is left to dry before being bisque-fired. This initial firing solidifies the underglaze, preventing smudging or distortion during the glazing process. The final glaze selection plays a crucial role in the appearance of the marbled effect—glossy glazes enhance color contrast, while matte finishes create a more subdued, blended look. Transparent glazes allow the intricate patterns to remain visible, adding depth and richness to the final piece.
Underglaze marbling allows for intricate, painterly effects that can be refined even further with clear glazing.
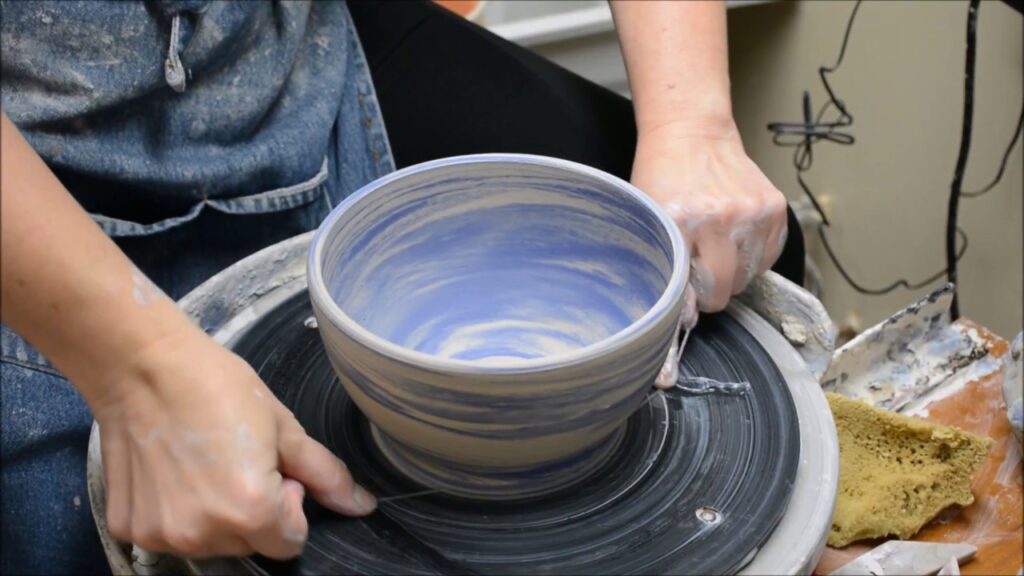
Marbling Pottery with Slip
The process begins with selecting a suitable clay body and preparing colored slips. Slip, a liquid mixture of clay and water, is tinted with ceramic stains or oxides to achieve various hues. The consistency of the slip must be carefully adjusted—not too thick to avoid clumping, yet not too thin to prevent excessive spreading. The base clay piece, whether wheel-thrown or hand-built, is allowed to reach the leather-hard stage before applying the slip to ensure optimal adhesion.
Creating the Marbled Pattern
To achieve the marbled effect, different colored slips are carefully poured, brushed, or dripped onto the clay surface. The patterns emerge through deliberate swirling, feathering, or combing techniques, allowing the colors to intertwine organically. Movement and layering are key in this stage, as excessive blending can result in a muddy appearance, while strategic manipulation preserves distinct lines and depth. Artists often tilt or rotate the piece to guide the natural flow of the slip, enhancing the dynamic quality of the marbling.
Refining the Surface and Drying
Once the marbled design is set, excess slip is smoothed out, and any irregularities are refined using a soft brush or sponge. The drying process requires careful monitoring to prevent cracks or peeling, as differences in moisture content between the base clay and the slip can lead to tension. Slow, even drying helps maintain the integrity of the design while preparing the piece for the next stages.
Firing and Finishing the Piece
After thorough drying, the pottery undergoes bisque firing to stabilize the marbled pattern. Depending on the desired effect, a transparent or semi-transparent glaze is applied to accentuate the depth and contrast of the colors. The final high-temperature firing vitrifies the clay and glaze, preserving the intricate marbled design in a durable, glossy, or matte finish. The result is a visually dynamic ceramic piece that showcases the fluid beauty of slip marbling.
Finishing and Firing Marbled Pottery
Once the marbling process is complete, the piece enters a critical drying phase. Controlled drying prevents warping and cracking, especially since marbled designs involve multiple layers of clay or slip, each with different moisture levels. The piece is left to dry slowly and evenly, often under plastic covers or in a humidity-controlled environment. At this stage, careful surface refinement is essential—any excess slip or uneven edges are smoothed out with a damp sponge or fine sandpaper. This ensures that the final piece has a polished and cohesive look before firing.
Bisque Firing for Stability
The first firing, known as bisque firing, is crucial for strengthening the pottery while maintaining its porous nature. The dried piece is placed in a kiln and gradually heated to a low temperature, typically around 1000 °C (1832°F). This process burns out organic materials, hardens the clay, and stabilizes the marbled patterns. Since different clays and slips may shrink at slightly different rates, careful kiln loading and a slow firing schedule help prevent stress cracks. After cooling, the bisqueware is ready for further finishing touches, such as glazing.
Glazing to Enhance Marbling
Applying glaze enhances the depth and vibrancy of the marbled patterns. A transparent or semi-transparent glaze is often chosen to preserve the fluid details without obscuring the design. Depending on the desired effect, the glaze can be applied through dipping, spraying, or brushing. Some potters opt for a matte finish to highlight the raw, organic movement of the marbling, while others prefer a glossy surface to intensify the contrast between colors.
Final High-Temperature Firing
The final firing vitrifies the clay and glaze, making the piece durable and functional. The kiln is fired to a higher temperature, typically between 1200 °C and 1300 °C (2192°F-2372°F), depending on the clay body and glaze used. During this phase, the glaze melts and fuses with the ceramic surface, deepening the marbled patterns and creating a permanent finish. After cooling, the pottery emerges with its final appearance—smooth, refined, and with a striking interplay of color and texture.
To preserve the clarity of marbled patterns, avoid opaque or heavily pigmented glazes that might obscure the details.
Marbled pottery is a fascinating technique that blends science and artistry, offering endless opportunities for creative expression. Whether you choose to marble directly with colored clay or experiment with underglaze and slip, each piece you create will be one-of-a-kind. With practice, you’ll develop your own unique style and methods for achieving the perfect marbled effect.